300x250 AD TOP

Search This Blog

Pages

Featured Post

Visualizing Embedded System Behavior with Perfetto

Segger SystemView and Percepio Tracealyzer have been the de-facto standard for visualizing embedded system behavior for the past few years, ...

Paling Dilihat

Powered by Blogger.

Feature Label Area

Thursday, January 12, 2023

Visualizing Embedded System Behavior with Perfetto

Segger SystemView and Percepio Tracealyzer have been the de-facto standard for visualizing embedded system behavior for the past few years, While Segger has been able to only visualize a single core, Percepio pricing is prohibitive to the hobbyist, last but not least is the toem Impulse which requires eclipse and some people have an aversion to that as well.


Perfetto

Perfetto is a System profiling, app tracing and trace analysis tool, it is open source and available as an online app, further more, its designed to handle millions of events, have SQL query, visual metrics and can handle multiple cores with no problem. Sounds like a perfect tool for the job no?

However, it was designed to visualize chrome and linux kernel (ftrace) traces and unfurtunately no support for the standardized SystemView file format. But how complicated is that format?

Apparently Espressif wrote a SystemView decoder and Perfetto wrote the protobuf files for ftrace, so its just a matter of mapping between them.

Example

This example is taken from sample 3 in the converter I wrote.


SystemView with Example 3


Perfetto with Example 3


As always you can find the fruits of my labor at my GitHub account.


Tags: , , , , ,

Wednesday, December 28, 2022

ESP32 Performance Profiling

The ESP32 is very capable but even the most capable of devices can get overwhelmed when using it extensively, so how can we find out what is taking so long or which function should we optimize to make things even better?


FreeRTOS Real Time Stats

FreeRTOS has a function vTaskGetRunTimeStats which can get statistics for tasks runtime, however the API takes some performance away. So it needs to be enabled in the configuration CONFIG_FREERTOS_GENERATE_RUN_TIME_STATS.

The following is an example from esp-idf examples.

Getting real time stats over 100 ticks
| Task | Run Time | Percentage
| stats | 938 | 0%
| IDLE | 403920 | 20%
| IDLE | 242954 | 12%
| spin3 | 225340 | 11%
| spin5 | 225360 | 11%
| spin6 | 225344 | 11%
| spin1 | 225392 | 11%
| spin4 | 225392 | 11%
| spin2 | 225360 | 11%
| esp_timer | 0 | 0%
| ipc1 | 0 | 0%
| ipc0 | 0 | 0%
Real time stats obtained

While this can help you zone in the task that takes the most time it won't help you find the slowest function or stack trace.

So when analyzing a potential performance issue, I'd use it as the first step to finding the tasks that take unusual amount of the CPU time.

Profilers

There are 2 general types of profilers, sampling profilers and tracing profilers. Sampling profiles capture the state of the program every x. Tracing Profilers inject hooks which are executed before and after each function.

While its possible to run both on ESP32, I've encountered problems trying to use a tracing profiler on ESP32 on PlatformIO since it uses the same build_flags -pg for both the bootloader and the application and it causes issues with missing _mcount function.

That leaves the sampling profiler option still available. But how to determine which function is currently running?

We can do it in two ways:

1. Sample each FreeRTOS task, since the stack pointer can be accessed we can check each stack pointer for the current PC (Program Counter) and determine which function is currently running. 

2. Sample the currently executing function, this can be done with interrupts since the interrupts share the currently executing task stack all we need to do is skip the counter's functions and the rest of the stack belongs to the currently running task. Since we have two cores we need to do it for both cores.

I've chosen to go with option no. 2 since it tells me more about what is currently running.

ESP32 Semihosting Profiler

It works by sampling the entire call stack and keeping statistics on the number of times a function was seen in the call stack, it then sends that information to the host computer though semihosting file system.

Once the sampling is done, the raw samples are processed to get the function name and locate the source line and the results are displayed and callgrind file is generated.

prvIdleTask tasks.c:3973  -> esp_vApplicationIdleHook freertos_hooks.c:63 : 783 307926512 76424201
vPortTaskWrapper port.c:131 -> prvIdleTask tasks.c:3973  : 783 307926512 76424201
esp_vApplicationIdleHook freertos_hooks.c:63 -> cpu_ll_waiti cpu_ll.h:183 : 781 307926512 76424201
vPortTaskWrapper port.c:131 -> spin_task4 real_time_stats_example_main.c:163 : 206 70213898 30992208
vPortTaskWrapper port.c:131 -> spin_task1 real_time_stats_example_main.c:151 : 204 70204906 31215652
vPortTaskWrapper port.c:131 -> spin_task5 real_time_stats_example_main.c:167 : 202 86176568 34547921
vPortTaskWrapper port.c:131 -> spin_task2 real_time_stats_example_main.c:155 : 201 97310444 38941256
vPortTaskWrapper port.c:131 -> spin_task6 real_time_stats_example_main.c:171 : 201 89345478 35511218
vPortTaskWrapper port.c:131 -> spin_task3 real_time_stats_example_main.c:159 : 201 68584391 30480011
spin_task4 real_time_stats_example_main.c:163 -> spin_task real_time_stats_example_main.c:143 : 134 62236086 27673084
...


As always you can find the fruits of my labor at my GitHub account.


Tags: , , ,

Wednesday, November 30, 2022

Generic Gamepad for Toy Cars

Some kids love motorized toys, cars, trucks and basically anything that makes a noise or have a motor can be a child's toy.

I've been searching for a quick, simple, cheap, generic option to replace the remote controls with something I can easily source without building a specialized PCB or costing too much and I think I've found that option.

This is the battlebot I've been using it for, the original controller stopped working after 3 minutes.

Wemos D1 R32

The Wemos D1 R32 is ESP32 in Arduino Uno form factor. The pinout is standard while still allowing access to all Arduino Uno standard pins and GPIO2 for onboard led. The schematics are available.


L293D Motor Control Shield

The motor shield was originally created by Adafruit but has since become ubiquitous through other online shops.


But it was designed to work with Arduino Uno so I had to go through the schematic to understand how the ESP32 should access it.


  DIR_SER - GPIO12
  PWM1A - GPIO13 - servo2
  PWM1B - GPIO5 - servo1
  PWM2A - GPIO23 - dc1
  DIR_LATCH - GPIO19
  DIR_EN - GPIO14
  PWM0A - GPIO27 - dc4
  PWM0B - GPIO16 - dc3
  DIR_CLK - GPIO17
  PWM2B - GPIO25 - dc2

Bluepad32

Bluepad32 was created by Ricardo Quesada, it was designed to to allow using newer gamepad controllers with retro gaming consoles.


While it has a long list of supported controllers, I've found that the DualShock 4 works best for me.

To pair the DualShock 4 to ESP32 you'll need to turn it on while pressing the "SHARE" button and PS Button.

Firmware

After mapping the pins between the ESP32 and the Motor Shield, I needed to write a new Bluepad32 platform, I've called mine uni_platform_motor. The new platform uses Adafruit's AFMotor to control the motors, but you can use anything else you'd like to control.

The uni platform has the following important events:
- on_init_complete - which fires when the platform is initialized
- on_device_connected - where you can do motor arming 
- on_device_disconnected - where you can do motor disarming, stopping the engines etc'
on_gamepad_data - where you can process incoming joysticks and buttons processing and convert it into motors commands.

Porting AFMotor

The AFMotor was not designed for ESP32 and I did a very crude job of porting it since it was just to see if they can work together and it was good enough.
Please note that the Motor Driver uses a few pins that might not be mapped to GPIO, (for example: pin 14), to use these pins its not enough to use the gpio_set_direction, but rather you should use the more generic gpio_config.

Motor Direction Algorithm


Summary

The proposed solution enables relatively cheap components to be bound to a single remote and so I don't have to disassemble the controller or build my own. 
Also, thinking about the future, it can be used for scratch or Arduino development with the same hardware so another one for the pros list.

Lastly, The DualShock4 can be used with other game consoles, PCs, TV Stocks etc' therefore future proofing the whole expense.

I would like to express my gratitude again to Ricardo Quesada for making the Bluepad32.

As always you can find the fruits of my labor at my GitHub account.


Tags: , , ,

Wednesday, November 23, 2022

Embedding Lua in your Projects

Lua is lighweight programing language designed for embedding, it was created in 1993 by Roberto Ierusalimschy, Luiz Henrique de Figueiredo, and Waldemar Celes.

Lua even has a very fast LuaJIT which sadly I cannot use since I'm aiming for embedded MCU.


Fortunately, Lua has great documentation and huge community, while the language needs some getting used it, it can do everything I need and more and embedding it was by far the fastest from previous MicroPython and QuickJS.

Installation of the Lua library was very simple, download the release, extract it in the lib folder and add library.json.

To gain the performance I needed, I've modified luaconf.h

1
2
3
/* Default configuration ('long long' and 'double', for 64-bit Lua) */
#define LUA_INT_DEFAULT		LUA_INT_INT
#define LUA_FLOAT_DEFAULT	LUA_FLOAT_FLOAT

To initialize Lua a new state is created and the default libraries added to it

1
2
3
4
5
6
7
8
9
lua_State *L = luaL_newstate(); /* create state */
if (L == NULL)
{
    l_message(argv[0], "cannot create state: not enough memory");
    return EXIT_FAILURE;
}

printf("setting libs\r\n");
luaL_openlibs(L);

Next is injecting the demo function into the state

1
2
3
function transform(a,b)
    return (a^2/math.sin(2*math.pi/b))-(a/2)
end

 1
 2
 3
 4
 5
 6
 7
 8
 9
10
11
12
char *code = "function transform(a,b)\r\n \
return (a^2/math.sin(2*math.pi/b))-(a/2)\r\n \
end\r\n";

if (luaL_loadstring(L, code) == LUA_OK)
{
    if (lua_pcall(L, 0, 0, 0) == LUA_OK)
    {
        // If it was executed successfully we remove the code from the stack
        lua_pop(L, lua_gettop(L));
    }
}

And to run the transform function, the function name is pushed along with its arguments, the function is called and the result is pulled back from the stack

1
2
3
4
5
6
lua_getglobal(L, "transform");
lua_pushnumber(L, i);
lua_call(L, 2, 1);

double res = lua_tonumber(L, -1);

Summary

Lua was the easiest to integrate, it is the fastest scripting engine and if speed is your primary concern it should be one of the top candidates.

In my particular use case:
  • x64 native vs Lua slow down is about 4x times
  • ESP32 native vs Lua slow down is about 20x times


As always you can find the fruits of my labor at my GitHub account.


Tags: ,

Embedding QuickJS in your Projects

QuickJS is small and embeddable Javascript engine made by the famous Fabrice Bellard, it supports ES2020 specifications and made available under MIT license.

You might have read about my porting of his TinyEMU to ESP32 which could boot linux.


During my hunt for scripting engine that can be integrated into a new embedded product I've encountered MicroPython and QuickJS, while the documentation is a bit lacking, the code was much easier to read and compile, there are no complicated build scripts and it was basically dropping the last version in the lib folder and selecting which files should be compiled with library.json

Once the library was compiled, integrating it into my demo was very easy and supporting multiple execution contexts is very easy since its not sharing context and variables.

 1
 2
 3
 4
 5
 6
 7
 8
 9
10
11
12
13
14
JSRuntime *rt = JS_NewRuntime();
if (!rt)
{
    fprintf(stderr, "qjs: cannot allocate JS runtime\n");
}

JS_SetMemoryLimit(rt, 80 * 1024);
JS_SetMaxStackSize(rt, 10 * 1024);

JSContext *ctx = JS_NewContext(rt);
if (!ctx)
{
    fprintf(stderr, "qjs: cannot allocate JS context\n");
}

The JSRuntime object represents the JavaScript engine, its responsible for memory allocation and C function calls. 

The JSContext object respresents the execution context where JavaScript functions and variables live.

Our demo workload

1
2
3
function transform(a, b) { 
    return (a ^ 2 / Math.sin(2 * Math.PI / b)) - a / 2; 
}

We'll eval(uate) the function to get it into the context

1
2
3
4
5
6
const char *expr = "function transform(a,b){return  (a^2/Math.sin(2*Math.PI/b))-a/2;}";
JSValue r = JS_Eval(ctx, expr, strlen(expr), "", 0);
if (JS_IsException(r))
{
    printf("Error evaluating script\r\n");
}

And once we have the function in the context, we can get it by name and execute it with the a and b arguments

 1
 2
 3
 4
 5
 6
 7
 8
 9
10
11
12
13
14
15
16
17
18
19
JSValue args[2];
args[0] = JS_NewFloat64(ctx, (double)i);
args[1] = JS_NewFloat64(ctx, (double)i);
JSValue res = JS_Call(ctx, func, global, 2, args);
if (JS_IsException(res))
{
    printf("Error Executing transform\r\n");
}

if (!JS_IsNumber(res))
{
    printf("is not number!\r\n");
}

double result;
if (JS_ToFloat64(ctx, &result, res))
{
    printf("error parsing number\r\n");
}

Summary

QuickJS looks very interesting as a JavaScript runtime engine, its relatively fast and the code seems self explanatory. It has been embedded in rust, as an isolated VM in Node JS and more.

While QuickJS is different from MicroPython, its faster to execute the same workload, it was more readable for me and faster to setup and compile, one of the major drawbacks is that if you want to use it as an alternative to MicroPython, you'll need to implement your own hardware drivers for SPI, I2C etc'.

You may find Carlos Alberto's Writing native modules in C for QuickJS engine useful.

Lastly, I've attempted to modify QuickJS to use floats instead of double since ESP32 FPU is single precision only, it will probably make it non-standard and fail many JavaScript standard tests but I've included it here anyway.

In my particular use case:

  • x64 native vs QuickJS slowdown is about x9 times
  • ESP32 native vs QuickJS slowdown is about x63 times
  • ESP32 native vs QuickJS using float slowdown is about x25 times

You may view the official benchmarks here.

As always you can find the fruits of my labor at my GitHub account.


Tags: , , , ,

Thursday, November 17, 2022

Embedding Micropython in your Projects

MicroPython is a python implementation for microcontrollers and other low resource requirement implementation which can make it perfect for embedding without significantly increasing your delivered executable or firmware.

The project was created by Damien George at 2013 and has since grown and improved and even earned its place at OBCPs and is planned to reach space on board Euclid at 2023 as well as integrating into RODOS.


If it can work for spacecrafts, why shouldn't it work for you?

My original goal was to use MicroPython as an expression evaluation and enrichment engine for embedded data acquisition, however, I've found that the complexity of actually integrating it into a PlatformIO project was too big to miss on an opportunity to make it an easier task.

MicroPython Project Structure

After downloading the release (in my case 1.19), the archive has the following interesting folders:

py - contains MicroPython VM

ports - contains platform specific implementation and support functionality

extmod - extra modules

I was a bit naïve, so I've decided to build all files in py and windows port but there were so many errors I've realized its probably the wrong approach.

I've started digging in the makefiles since I wasn't sure what to look for, the instructions were pretty standard. but once you start looking in the makefiles, there's plenty going on there.

But there's no easy way to use that in PlatformIO as far as I know, so I went ahead and checked what was executing when and why, there's some documentation about qstr but there are also modules and version info, some of it to optimize the build and prevent a rebuild of the whole qstr header.

I wanted to avoid precompiling the headers and keeping them in git, since it will complicate version updates, build flags changes and built-in module changes, there have been similar approached with NXP port but I wanted it to be more robust and developer friendly.

I've decided to keep it short and just write a script that executes all the scripts on the appropriate files and folders and after some fiddling with the list of sources that needed to be compiled, the project compiled on both Windows and ESP32.

Building MicroPython on PlatformIO

PlatformIO uses scons to build, scons keeps a series of flags and dictionaries of the files to build and uses the compiler so actually generate the executable and firmware. Though in ESP32 case it uses cmake as well to build esp-idf.

PlatformIO also added hooks before and after building the project, allowing extensibility through scripting, in this case I've chosen to execute a script in the library so its always executing before the build.

I went ahead and made the build system a bit more flexible by allowing different sources and includes to be used for different platforms. You may want to look in build_settings.py to see how.

In short, the script determines the framework and platform and reads the library.json->build->environments, it appends all the sources and flags from common and then looks for a specific platform and appends the sources and flags from there as well.

I then read list of file selectors (SRC_FILTER) and build a list of source files so it can be used to generate the headers with generate_strings.py

  • makeversionhdr - generates the mpversion.h
  • makeqstrdefs pp - generates qstr.i.last from a batch of source files and headers
  • makeqstrdefs split qstr - extracts a list of qstr from the last qstr.i.last, this may run a few times with a few different qstr.i.last
  • makeqstrdefs split module - extracts a list of modules from the last qstr.i.last, this may run a few times with a few different qstr.i.last
  • makeqstrdefs cat module - generates a collected file from the splitted modle files
  • makeqstrdefs cat qstr - generates a collected file from the splitted qstr files
  • makemoduledefs - generates moduledefs.h from the collected module file
  • qstrdefs_preprocessed - precompiles strings into preprocessed.h
  • qstrdefs_generated - generates generated.h from preprocessed.h
Once this process is done, the qstr and modules dictionaries are ready to be compiled into the library.

Generic Port

MicroPython uses a set of configuration header files and functions so it will be portable and work across multiple environments but to run it without any special hardware modules requires very little configuration.

I've created a "generic" port:
  • mimimal gc
  • unhandled exceptions are sent to stderr
  • all filesystem operations are throwing errors
  • all python's print are sent to stdout, stdin does nothing

Initialization

To initialize micropython we need a stack and heap and then initialize the stack, the stack limit, the garbage collector which also handles allocations and finally MicroPython.

Please note there are two stack limits, one for python (pystack) and one for the OS limit, which is used to limit the recursion the MicroPython engine uses - it should be less than the OS stack size, looking at MicroPython's code, its about 2k less than the OS stack.

 1
 2
 3
 4
 5
 6
 7
 8
 9
10
11
12
instance->stack = (uint8_t *)malloc(instance->stack_size);
instance->heap = (uint8_t *)malloc(instance->heap_size);

mp_stack_ctrl_init();
mp_stack_set_limit(instance->stack_size);

// Initialize heap
gc_init(instance->heap, instance->heap + instance->heap_size);
mp_pystack_init(instance->stack, instance->stack + instance->stack_size);

// Initialize interpreter
mp_init();


NLR

NLR stands for non-local return, which is how MicroPython handles exceptions in C, using a stack of jumps.

 1
 2
 3
 4
 5
 6
 7
 8
 9
10
11
12
nlr_buf_t nlr;
if (nlr_push(&nlr) == 0)
{
    mp_obj_t retval = mp_call_function_n_kw(func, argc, 0, argv);
    nlr_pop();
    return retval;
}
else
{
    mp_obj_print_exception(&mp_stderr_print, MP_OBJ_FROM_PTR(nlr.ret_val));
    return (mp_obj_t)nlr.ret_val;
}

1-2 define a temporary nlr buffer and push the current context.
4 execute a MicroPython function
5 pop for successful execution
8 in case there's an error between lines 3-7 the IP will jump to line 9.
10 display the error

Executing Scripts and Calling Functions

While it seems very similar in python, there is a difference, executing a script might have an output, it is not captured, so there is no way to use that output unless you plan on capturing and parsing Python's print.

This is why I chose to split that functionality into two parts, the first part executes a script, creating functions / variables on the local/global scope and the second part executes a function and uses its return value.

For executing scripts, MicroPython needs to parse the string and compile it into MicroPython bytecode and execute it. So once the script is in the context, we can use the module for looking up the function name and execute it.

We'll pass the following script to the compilation code

1
2
3
import math;
def transform(a,b):
    return (a**2/math.sin(2*math.pi/b))-a/2


 1
 2
 3
 4
 5
 6
 7
 8
 9
10
11
12
13
14
15
16
17
18
nlr_buf_t nlr;
if (nlr_push(&nlr) == 0)
{
    qstr src_name = 1 /*MP_QSTR_*/;
    mp_lexer_t *lex = mp_lexer_new_from_str_len(src_name, fragment, strlen(fragment), false);
    qstr source_name = lex->source_name;
    mp_parse_tree_t pt = mp_parse(lex, MP_PARSE_FILE_INPUT);
    mp_obj_t module_fun = mp_compile(&pt, source_name, false);
    mp_call_function_0(module_fun);

    nlr_pop();
    return NULL;
}
else
{
    mp_obj_print_exception(&mp_stderr_print, MP_OBJ_FROM_PTR(nlr.ret_val));
    return (mp_obj_t)nlr.ret_val;
}

And now we can lookup transform (line 1) function and call it (line 10)

 1
 2
 3
 4
 5
 6
 7
 8
 9
10
11
12
13
14
15
16
17
18
mp_obj_t transform_function = mp_obj_dict_get(mp_locals_get(), mp_obj_new_str("transform", strlen("transform")));

mp_obj_t args[2];
args[0] = mp_obj_new_float(1);
args[1] = mp_obj_new_float(2);

nlr_buf_t nlr;
if (nlr_push(&nlr) == 0)
{
    mp_obj_t retval = mp_call_function_n_kw(transform_function, argc, 0, argv);
    nlr_pop();
    return retval;
}
else
{
    mp_obj_print_exception(&mp_stderr_print, MP_OBJ_FROM_PTR(nlr.ret_val));
    return (mp_obj_t)nlr.ret_val;
}


Summary

MicroPython has advanced light years since its first inception and it is very capable and enables rapid prototyping and even usable for space applications. That being said, its still a bit slow to function as a generic programming language and more appropriate for coordinating calls to C functions.

The other thing I've found lacking is documentation, to write this demo I needed to go over multiple sources and demos, look for forks, pull requests and read a lot of source code, its still not 100% clear to me what all the defines are doing exactly and what to expect in terms of performance impact for each of them.

In my particular use case:
  • x64 native vs MicroPython slowdown is about x16 times.
  • ESP32 native vs MicroPython slowdown is about x100 times.

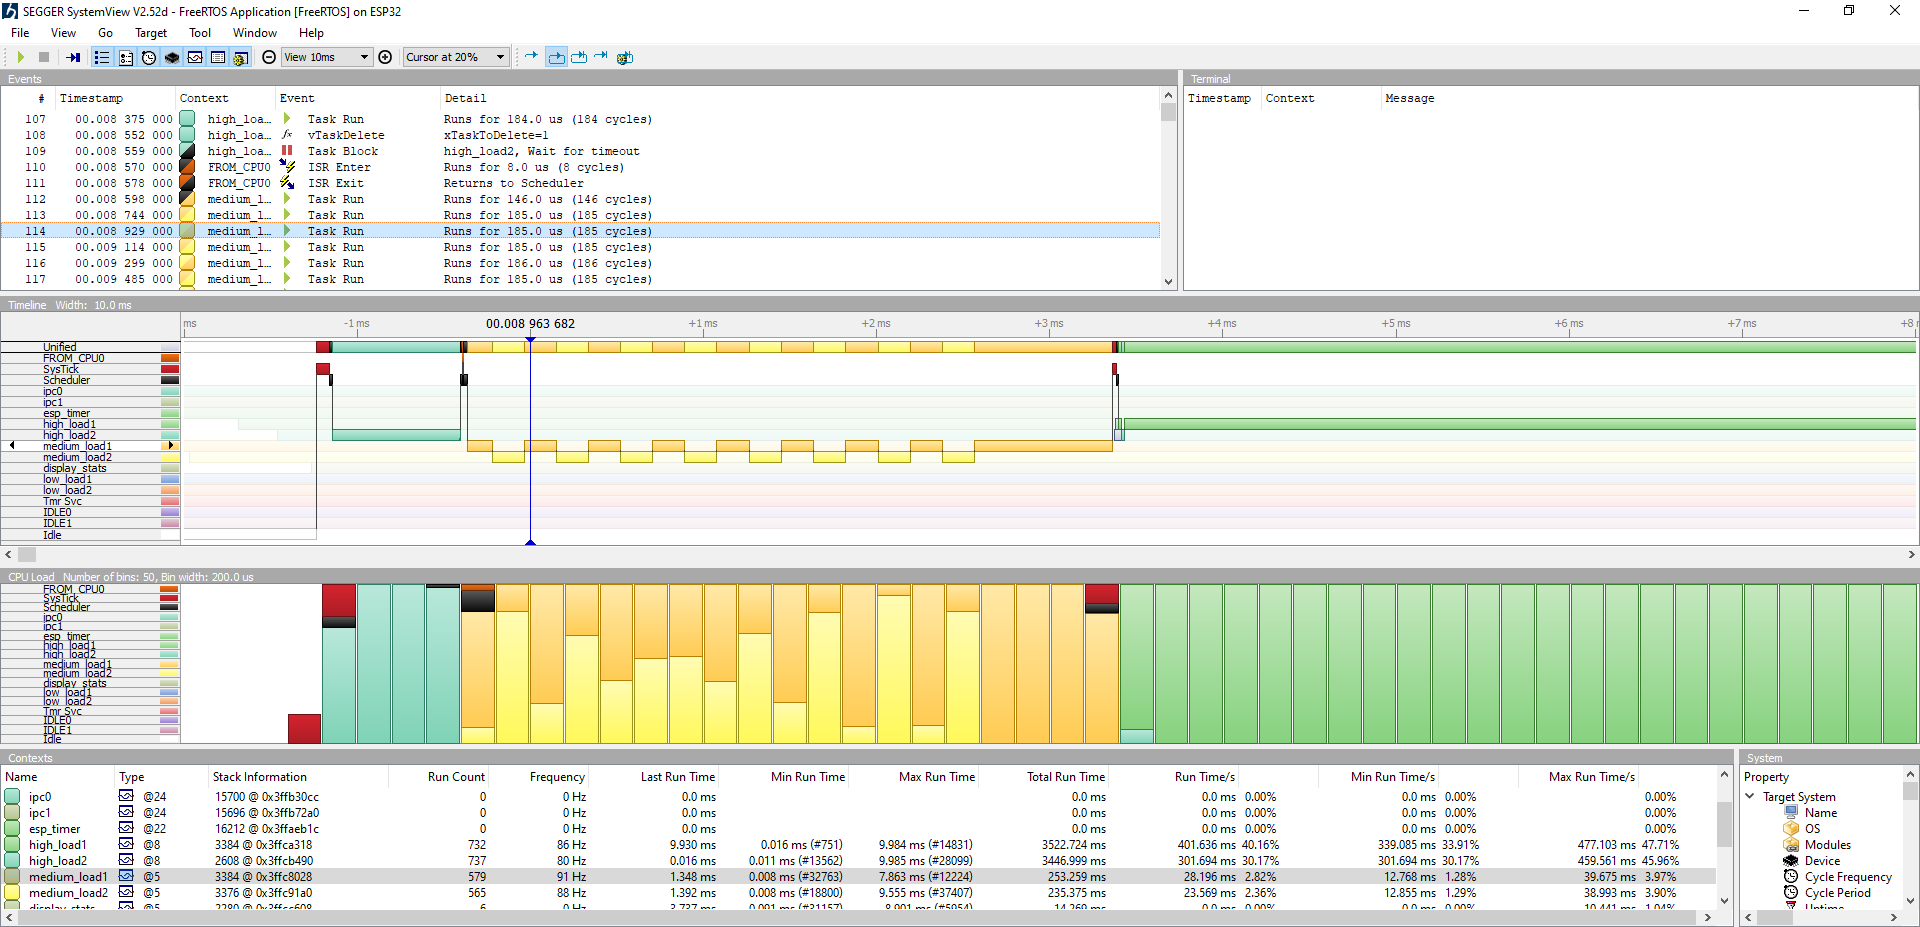
For the curious minds of where did the CPU spent its time, I'm very happy to have found Very Sleepy


As always you can find the fruits of my labor at my GitHub account.


Further reading:


Tags: , , ,

Thursday, July 28, 2022

Using the ILI9488

The ILITEK ILI9488 is one of the larger and cheaper SPI displays available to the maker community,, available in 3.5" and 4". However, there are a few workable issues that prevent this display from being great.


Specifications

What's called ILI9488 is actually the LCD controller with an optional touch panel, you can mostly find it with XPT2046 resistive touch controller.

ILI9488 (datasheet):
- 3/4 wire SPI, software configurable
- 480x320 Pixels
- 3 modes supported: 16bit (65k colors) / 18bit (262k colors) / 24bit (16.7m colors)

XPT2046 (datasheet):
- 12bit 125khz resistive touch panel
- pressure sensitive
- temperature sensor
- 4-wire SPI
- Supports touch interrupt

5v to 3.3v regulator, please note that you should short J1 if you're using 3.3v


General Issues


The ILI9488 can be bought in two versions, one with a diode and one without, I've yet to determine the functionality of the diode, but it seems that others think the diode can prevent the display from releasing the MISO line, unfortunately I didn't keep the diode so I can't validate this claim.

The schematics are available if you want to explore it further.


LVGL Issues

When I first started working with my ILI9488 the colors were a bit off but I attributed it to cheap and low quality display which was probably defective. but then I've started wondering if its possible to fix since the controller can be configured with other voltages it pushes to the panel. 

Original Configuration (16 bit)

Once I've discovered the setting, I've changed the brightness and changed how RGB565 is parsed into the format ILI9488 expects. note its not the most optimized way, but the modification was good enough for my tests.

After the modifications


I wanted to see if the display will work at 80Mhz, unfortunately its not, but seeing some of the graphics I guess that it can be fixed with a logic analyzer and some patience.

80Mhz


ESP32 Specific Issues

While it might not be specifically ESP32 issues, its issues that you might encounter while integrating it with ESP32. The most prominent issue is the way CS works in ESP32, it seems that CS issues are common in the embedded world, the STM32 has a similar issue with NSS not properly controlled by the cube's code.

To support multiple transactions with multiple devices on the same SPI bus, the ESP32 switches off the CS signal between transactions which is great, however, the way ILI9488 works is that if you switch off CS after you've sent a read request, it switches from 4-wire SPI to 3-wire SPI. 

There are a few ways to solve this issue:
1. Use software CS, set to low before a transaction and set to high after you're done receiving.
2. Use the new SPI_TRANS_CS_KEEP_ACTIVE flag for transactions.

But wait, what's the problem with working half duplex (3-wire)? 
Well, if you share the same SPI bus with the touch panel it locks the MISO line on LOW and won't allow the touch panel from transmitting touch data.

Solutions?

Well, I've given up on getting data from the display and for most uses its good enough, so you can disconnect the MISO line from the display and keep it working for the touch panel.

Another possibility is to put a 1k resistor in series to the display MISO. This way the panel won't lock the touch and you can keep the buggy code until you can get it fixed to your satisfaction.

Unfortunately working in half-duplex is not currently possible if you're using the LVGL driver since it will attempt to set the bus to 4-wire mode for the touch panel to work.


Tags: , , ,

Sunday, July 24, 2022

LVGL ESP32 and Desktop Development Walkthrough

UI for Embedded is always a hassle, find the right MCU, find the right Display, connect the right wires and that's even before writing the first line of code that actually shows anything on the display, drivers, graphic libraries and input libraries can be a pain to use, not to mention a pain to write.

Fortunately, we no longer live in a cave, we have PlatformIO, LVGL and drivers for many of the LCDs available for commercial use and maker community.

I propose a way to start quickly so we can save some of the bring up time for a new setup, configuration is done in the kconfig way, so its really go through the menu, change a setting, compile and test.

There is a getting started for ESP32 on LVGL github, Gabor Kiss-Vamosi wrote a tutorial and we have some documentation, Espressif event got an example repository, but I've discovered my way is a bit more flexible and easier to use once its set-up, since you can develop on the desktop (LVGL refers to it as Simulator) and don't have to upload each revision, plus you don't have to do it, just fork my project and you're good to go. In any case, the full instructions are below, so you can mix and match versions and for me it provided a pretty much consistent experience.

Hardware

There are many kits you can buy, each one with its own quirks but my goal was to test what I had and unfortunately I had none of the kits.

So I got out a perfboard, a few pin headers and a resistor (more on that later) and built my own. 


Please note that I have yet to test any of them, so do your own research before purchasing, the following are affiliate links.

ESP32-LCDKit

The ESP32-LCDKit looks like its the most versatile for Graphic development, the schematic is available and you can use which ever ESP32 you want (as long as its a 38 pins)

ESP-WROVER-KIT

Next in line is the ESP-WROVER-KIT, like the previous one, its schematics are also available, but one major drawback is that the kit does not include a touch screen, only a display so its less suitable for interactive UI.


ESP32-S2-Kaluga-1 Kit


Next in line from Espressif is the ESP32-S2-Kaluga-1 Kit, this kit is more versatile and according to the documentation it does have a 3.2" touch screen but it can also have an audio extension, a touch panel (not display, just a board with touch) and a camera module.


WT32-SC01


Last but not least, The WT32-SC01 seems like it has great potential for having all the hardware on a single board, mounting holes and capacitive touch screen, schematics and code samples are available.

Source Control

We can't really start a project without source control, how can we track changes? how can we go back to a stable state?

Atlassian has a great cheat sheet and there is built in support in Visual Studio Code. 

Lets initialize a new git repo:

git init

I also recommend committing each stage of your setup, it will help you to track changes and find out which code caused the change.

PlatformIO

PlatformIO is a development platform that enables writing code in multiple platforms while maintaining a consistent experience.

In this case, we'd like to initialize a new project:

pio init

LVGL

Now that we have an empty project, we'll need to add lvgl to it, so go ahead and extract latest release from https://github.com/lvgl/lvgl/releases into lib/lvgl.

Than take library.json from our example project and copy it into lib/lvgl root, what this library.json file actually does is allow you to select which parts of lvgl gets compiled.

Native / Desktop Drivers

There are multiple ways of working with LVGL but one of the better ways is getting your UI completely disconnected from your business logic and running the UI on your PC, this way its easier to design, debug and verify, on top of it, you can use LVGL's snapshot API to automatically validate your views so they can stay consistent no matter which changes you do. 

The way LVGL works on the desktop is by using SDL2.

So first we'll extract the latest source from https://github.com/lvgl/lv_drivers into lib/lv_drivers

Then we'll copy lv_drv_conf_template.h to include/native/lv_drv_conf.h and enable the file (change #if 0 to 1)

Then we'll modify library.json to include SDL dependency, otherwise PlatformIO dependency detection won't work properly due to the way SDL is included through a #DEFINE macro.

    "dependencies":[

        {

            "name":"SDL2"

        }

    ],

And modify library.json to remove an incompatible source file:

    "build": {

        "srcFilter" : [

            "-<display/ILI9341.c>"

        ]

    }

Lastly, we'll update include/native/lv_drv_conf.h in appropriate place and copy our menu configuration keys to SDL configuration keys, otherwise our menu won't control SDL (Desktop) display properly.

    #include "lvgl_native_drivers.h"

    #define USE_SDL 1

    #define SDL_HOR_RES     CONFIG_SDL_HOR_RES

    #define SDL_VER_RES     CONFIG_SDL_VER_RES

Since our native environment will need to use SDL, we should also add SDL2 to lib, there are different libraries for different environments, such as Windows and Linux.
In Windows, we'll need to download SDL for mingw, extract it into our lib folder and copy library.json from this project to your SDL library

In Ubuntu its as simple as
apt-get install libsdl2-2.0 libsdl2-dev

Lastly we need to add our native drivers configuration script run_lvgl_native_drivers_kconfig.py and configure it with custom_lvgl_native_drivers_kconfig_save_settings and custom_lvgl_native_drivers_kconfig_output_header configuration keys

ESP32 Hardware Display Drivers

Now that we have our desktop setup, we also want our hardware setup so we can flash our device and see how our design looks on the real hardware.

Please note that the drivers are not always configured ideally, if the colors seems a bit off, you should read the datasheet and make sure everything is configured properly.

Lets start by extracting the latest source from https://github.com/lvgl/lvgl_esp32_drivers into lib/lvgl_esp32_drivers and copy the library.json from this project

Some drivers are not working properly with PlatformIO's scons configuration and needs to be enabled/disabled on a per-file basis, you should look in library.json as an example.

Another thing we want to tell our library.json is which framework it should work with, for example, in our setup we have native and esp32 environments and the esp32 drivers should not be compiled on the native environment since none of Espressif's libraries exist or even needed for desktops.

Then we'll modify lvgl_helper.c to include "lv_conf.h" right after "sdkconfig.h", the vanilla setup assumes your lvgl is part of esp32 components which can make desktop configuration a problem.

    #include "sdkconfig.h"

    #include "lv_conf.h"

Then we need to add lvgl kconfig script (run_lvgl_kconfig.py) and set  its configuration  custom_lvgl_kconfig_save_settings, custom_lvgl_kconfig_output_headercustom_lvgl_kconfig_include_headers configuration sections to each relevant environment in platformio.ini

And add lvgl esp32 drivers kconfig script (run_lvgl_esp32_drivers_kconfig.py) and custom_lvgl_esp32_drivers_kconfig_save_settings, custom_lvgl_esp32_drivers_kconfig_output_header configuration section to each relevant environment in platformio.ini

These two scripts and their setting enables platformio.ini to use the target scripts for easy configuration. To see which scripts are installed for each environment:

> pio run --list-targets
Environment    Group     Name                        Title                        Description
-------------  --------  --------------------------  ---------------------------  -----------------------------------
native         Custom    lvgl-config                 lvgl-config                  Executes lvgl config
native         Custom    lvgl-esp32-drivers-config   lvgl-esp32-drivers-config    Executes lvgl esp32 drivers config
native         Custom    lvgl-native-drivers-config  lvgl-native-drivers-config   Executes lvgl native drivers config

esp32          Custom    lvgl-config                 lvgl-config                  Executes lvgl config
esp32          Custom    lvgl-esp32-drivers-config   lvgl-esp32-drivers-config    Executes lvgl esp32 drivers config
esp32          Custom    lvgl-native-drivers-config  lvgl-native-drivers-config   Executes lvgl native drivers config
esp32          Platform  buildfs                     Build Filesystem Image
esp32          Platform  erase                       Erase Flash
esp32          Platform  menuconfig                  Run Menuconfig
esp32          Platform  size                        Program Size                 Calculate program size
esp32          Platform  upload                      Upload
esp32          Platform  uploadfs                    Upload Filesystem Image
esp32          Platform  uploadfsota                 Upload Filesystem Image OTA

Now that we've assigned each configuration output to a different folder under include, we should tell platformio to include headers from these folders so each environment will get a different set of configuration files.

LVGL Configuration

LVGL uses configuration files separate from the driver configuration files to configure some aspects of it, such as fonts, widgets, colors and layouts, but we need to tell it where to take the configuration from.

We do it by adding these flags to build_flags for relevant environments in platformio.ini:

    -DLV_LVGL_H_INCLUDE_SIMPLE

    -DLV_CONF_INCLUDE_SIMPLE

    -DLV_CONF_PATH=lv_conf.h

Environment Hardware Abstraction

There is a small library in the demo project called lvgl_hal, it contains the setup for the drivers, obviously different from native to ESP32, you may need to modify it to your environment / programming.

So copy lvgl_hal to your lib folder.

Changing Configuration

Lets start with ESP32 configuration, LVGL can run lean or resource intensive, larger buffers may help with rendering speed, caching images and data can also help, my usual setup is 240Mhz CPU speed and 80Mhz PSRAM speed. 

To make these configuration, you'll need to modify ESP32 configuration by running:

pio run -e esp32 -t menuconfig

We can configure ESP32 drivers:

pio run -e esp32 -t lvgl-esp32-drivers-config


And native drivers, which at the time of this writing is only resolution:

pio run -e native -t lvgl-native-drivers-config


And lastly we'll want to configure our lvgl, using the same configuration for both desktop and embedded can help you to find bugs quicker.

pio run -e esp32 -t lvgl-config

pio run -e native -t lvgl-config


Runner

The runner library is intended as an abstraction of the main function, on a desktop its int main(argc,argv), on ESP32 its appmain() and on Arduino its setup() and loop(), instead of writing the same ifdefs everywhere, just copy the runner library, include it in your main file and use it:

MAIN(){

}


Unfortunately my ILI9488 is not configured properly (more on that later)


If you're looking for a solution to the ILI9488 configuration issue, you can read about it here.


Tags: , , , ,